Christmas, Our way.

Standard

Christmas is over for another year, we are packing away the decorations and the wrapping aper and boxes have successfully been shoved in the recycling bin. Now that it is all over, I just thought I’d share a bit about our day.
It was set to be a fairly quiet Christmas in our house. For the first time ever, my husband and I were the most senior members of the family present, with just our children and and my daughter’s partner joining us for the day. Basically, it was just the people who live in our house and who are with us for almost every meal! This seemed like a fairly boring prospect to me – not that I don’t like eating with these people, just that we do it every day. I couldn’t imagine how we could make it ‘special’, and I was finding it very hard to get enthused.
I had bought a heap of seafood at our local farmer’s market and was trying to think of something cool to do with it, when the idea of making a paella jumped into my head. Closely followed by dreams of a Spanish feast with an assortment of Tapas dishes!
I was feeling a little more enthusiastic about the whole deal with this break away from tradition. The only problem was that when you don’t have a lot of people getting together it can end up being a huge workload for one person to try and make a special meal and I wasn’t looking forward to that.
It was about then that I had my second great idea (even if I do say so myself!). I asked each of the children if they could contribute a Spanish tapas dish to the meal. They needed to do some research on the internet and find a suitable dish to cook, organise the ingredients, and prepare the meal.
This task was approached with great enthusiasm by them all. It only took my youngest about 5 minutes to decide on his recipe, and fortunately for me it was a nice easy one (ie. not too messy!) – marinated mushrooms.
Axel with mushrooms
Next in line was my oldest son with a huge bowl of garlic prawns, complete with crusty bread to soak up the oily garlic sauce.
Jayden 1
Jayden 2
My middle son continued in the seafood theme making fried calamari with a garlic aoli dipping sauce.
Zac cooking
calamari
And finally my daughter and her partner made Spanish meatballs.
Cooking meatballs
They also decided to make a gingerbread house, which wasn’t exactly in keeping with the Spanish theme, but was yummy and fun and a reminder of the gingerbread houses we used to make every year when the children were younger.
Gingerbread house making
gingerbread house
I added to the tapas with crumbed green olives, chorizo and capsicum tarts, and chorizo in apple cider.
My tapas on table
The tapas made a delicious, long, all day lunch. We all took turns in the kitchen and just added our dishes to the table when they were ready. We even had little bell, so when a new dish was on the table the cook could ring the bell to let everyone know.
As you tend to do on Christmas day, for some reason I thought we would need more food!
We had the grand finale, a big seafood paella, and platter of slow cooked lamb shanks at about 9 o’clock that night, followed by Churros con Chocolate for dessert. These were actually a bit of a disaster, especially compared to the ones my beautiful Spanish friend sometimes makes for us, but everyone was too full by then to care anyway.
Paella
(This is not my usual Christmas look lol. We had been for a swim in the afternoon, so I have swimming pool hair and a sarong!)
I have to admit, I did miss having the huge crowd of family around that we used to have, but it was great fun to try something different from the traditional Christmas feast. The best thing was having all the kids involved, cooking together, and making some great Christmas memories.
I hope yours was great too. Sharee x

Here are some of the recipes we used…

Chargrilled Capsicum and Chorizo Tartletts
Fried Green Spanish Olives

Fried Chorizo with Apple Cider

Spanish Paella

Churros con Chocoate

Artist’s Books Progress Report

Standard

OMG! Only two weeks to before my work needs to be ready for the Artist’s Books Exhibition at the Riddoch Art Gallery. This is part of a group exhibition with the Thumbprint Printers Group, and I am pretty excited about it because the Riddoch Gallery is a wonderful regional gallery.
At this stage things are coming together quite nicely, but I still have a lot of finishing off to do and that always takes more time than you think it will.
I have a collection of books called Specimens.
It includes this Crabs book…

20120407-232308.jpg

20120407-232605.jpg

I still need to print the pages for this book and make up a latch system. The crabs are made out of recycled parts from my old electric organ that I played as a child (when they were all the fashion).
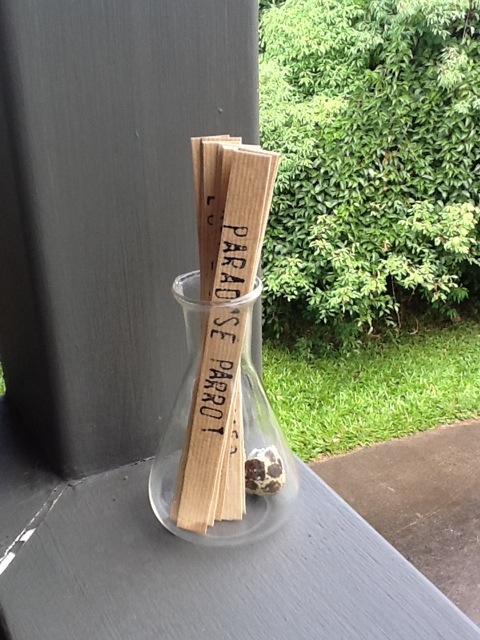
Also, this birds book…

20120407-232652.jpg
…which may challenge some people’s ideas of what constitutes a book, but I like it. I have filled the flask with name labels for different birds – those which the collector has been unable to find specimens of because they have been collected into extinction.
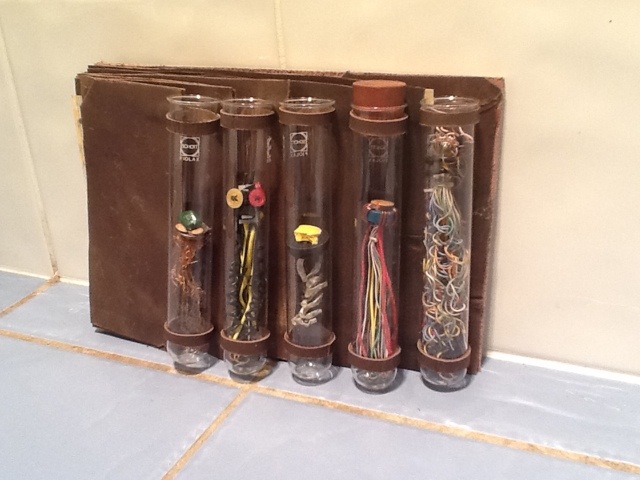
There is also a book of Jellyfish specimens. This book just needs to have some text added and be bound now.

20120407-233444.jpg
Oh, and I need to find some more old rubber stoppers to go in the tops of the test tubes.
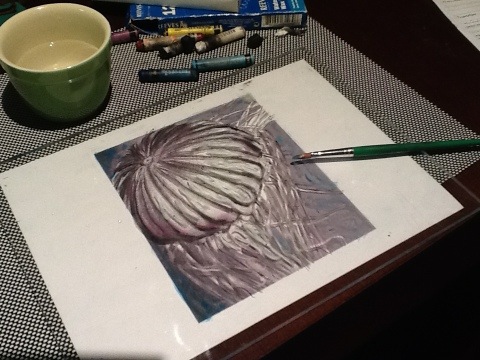
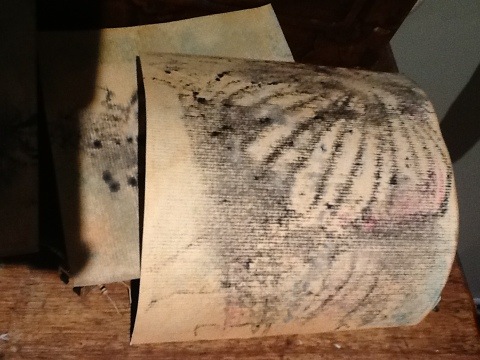
I wanted to get some waterry looking jellyfish pictures to go inside this book, so I have made monoprints using water soluble oil pastels.

20120407-233743.jpg

20120407-233756.jpg

20120407-233817.jpg

20120407-233825.jpg
I was quite happy with the results although I am still experimenting with the idea if adding a little ink painting to them.
There is also a book of Fish specimens on microscope slides, but this one is the least developed at this stage.

20120407-234301.jpg
I am using an encaustic technique on the microscope slides and am incorporating bits of rubbish that I find when I am walking my dog.
All if the Specimens books use mostly recycled or found objects.

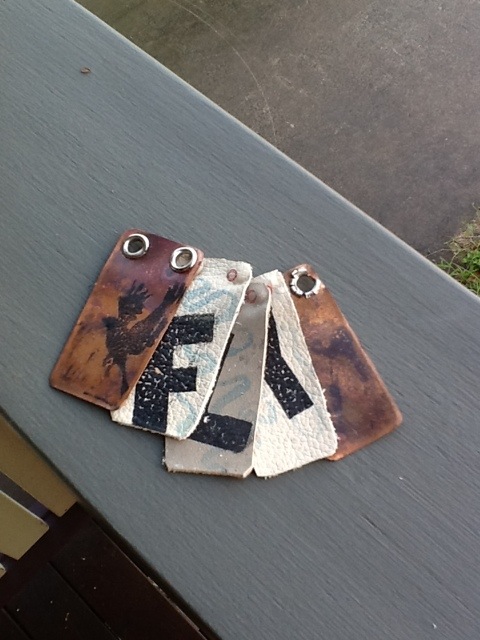
I have two other books as well. This one is called Fly and is a necklace book.

20120407-234610.jpg
I still need to string it up on some rings and a chain.

Finally, I have this one that I call Mehetibal in the Garden. I have used a cyanotype printing technique and also some lino prints on to clear plastic.

20120407-234849.jpg
It is also still waiting to be bound. I am intending to make a simple concertina binding incorporating sticks, and I am also planning to add some broken egg shell to some of the pages.

Looks like a busy couple of weeks coming up for me. Stay tuned for a sneak peak at the finished products soon.
All the best,
Sharee

My Favourite Home Made Body Products

Standard

People who have been following this blog for a while will know that I have been making a lot of products at home instead of buying them in order to try and save money. I thought that today I would do an update on how these products have been going.
Two products that I really love and have made a couple of times now, are home made deodorant and home made hair gel/ curl definer.

Here is the recipe I have been using for home made deodorant. It is so simple and takes only a couple of minutes to make.

Home Made Deodorant

1/2 cup bicarb soda
1/2 cup cornflour
coconut oil
a few drops tea tree oil

Mix together carb soda and cornflour, then gradually mix in enough coconut oil to form a paste (about the consistency of thick cream). Stir in tea tree oil and scrape into a wide mouth container.
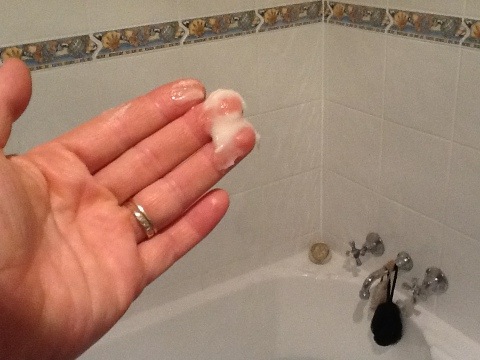
To use, scoop a little bit on to fingers and rub under arms – you don’t need very much.

20120404-212942.jpg

20120404-214009.jpg

If you have ever worried about the health effects of deodorants, or just want to save a little bit of money – try it, try it, try it! Honestly, this works really, really well. I have used it while exercising on a hot Queensland day with no problems – amazing!

This recipe came from
homestead Revival Blog

My next favourite recipe was originally called home made hair gel, but I prefer to call it home made curl definer.
This is the product I was using, it is quite an expensive product.

20120405-055118.jpg

This is a big statement, but I think the home made gel is much better (at least it is on my hair).

Hair Gel Recipe

2 tablespoons linseed
1 cup water

Put linseeds and water in a saucepan. Bring to the boil then simmer gently for 10 minutes (no longer).
Pour mixture through a fine sieve to remove linseeds and discard these.
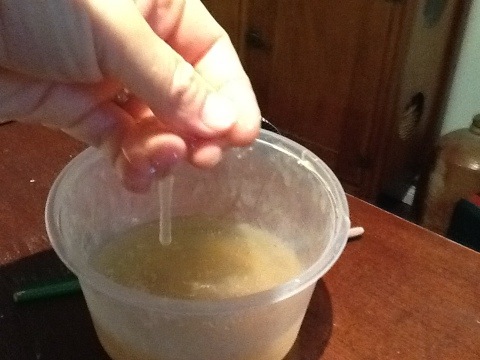
When mixture has cooled beat it with a whisk or beaters for a minute to break up the gel. Store in the fridge and discard if it starts to smell bad.
Use the same way that you would use a purchased product.

I have adapted this recipe from one I found at The Hairpin

20120405-060258.jpg

It is a little gross and slimy, but it works great and is so cheap, so try to get past that.

20120405-060454.jpg

20120405-061532.jpg

I am also loving the home made soap that we made. You have to leave soap for about a month before you can use it, so it’s very exciting to be able to finally try it out. It is beautiful and soft and silky to use and I can use it on my face with no problems. It is still a bit soft so a block doesn’t last all that long, but I think it will get harder if we wait longer.

IMG_0250

I have a book of gorgeous soap recipes so I am looking forward to trying a few of those now. It is really very easy and you can buy everything you need from the supermarket, so why not give it a go.
I used Rhonda’s recipe from the Down to Earth Blog

My purchased face moisturiser has almost run out, so I think my next experiment will be making moisturiser. I’m slightly nervous about this as my face is fairly sensitive, but we’ll see how we go. I know that it is certainly worth a try though because the savings can be huge, and it is a lot of fun.
Give it a try, I’m sure you will be amazed too.

All the best,
Sharee

Learning doesn’t stop for the holidays

Standard

First day of school holidays here in Queensland but as most homeschoolers will know, natural learning just doesn’t stop for the holidays. In fact, we have had a very productive day in our house today.
My youngest son is getting very excited that Easter is almost here. He had the idea that we should have an Advent style calendar to count down to Easter. OK, I know he was only after the chocolate, but never one to miss an educational opportunity, I told him that we could make a countdown calendar if he could find a way to incorporate some writing into it.
IMG_9536
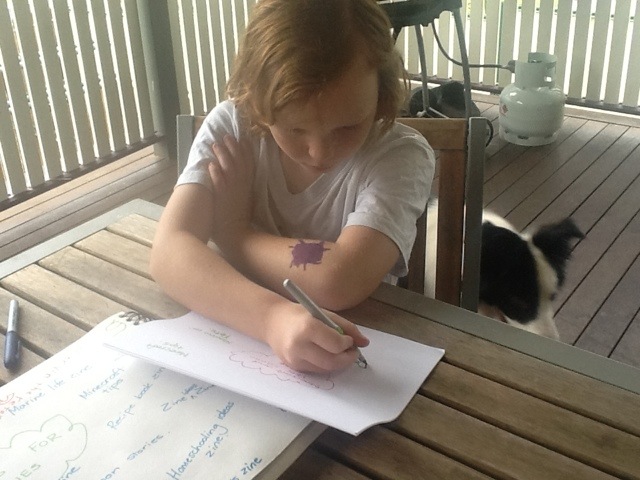
This turned out to be a very good plan. This very reluctant writer was hard at work copying the days of the week onto his countdown calendar in no time.

IMG_9538

He used an egg carton to make the countdown calendar, by simply cutting the lid into sections for each day of the week (unfortunately that only gave us 6 days, but we decided we didn’t need to count Easter Sunday). A small Easter egg was placed in each section.

IMG_9543

He was pretty pleased with the end product. This would be a great activity to do with children for learning the days of the week. Different treats could be used – lollies, stickers, lego blocks etc, and you could count down the days to any upcoming event such as a birthday, outing or just the weekend.
IMG_9540

I am making some Artist’s books at the moment and using a lot of leather in them. This gave him his next idea. He decided to cover an old sketch book in leather and turn it into a ‘Professor’s Journal’.
IMG_9551
He is now busy filling the journal with pictures of amazing imaginary animals that the Professor has discovered.
IMG_9548

A lot of reading is going on in our house at the moment. My 12 year old son is loving the Skulduggery Pleasant series. In fact these books have taken him from being an ‘I’ll read if I have to’ reader to an ‘always has his nose in a book’ reader. I highly recommend them. He has almost polished this one off in 2 days.
IMG_9553
I was excited to find the ‘Hey Jack’ series in KMart today. It is quite common for natural learners to learn to read much later than their school based peers. In fact there are many natural learners who have not started reading until they were 10 or 12years old, but have then been reading novels within a couple of weeks. The one problem this does cause is that when they are first learning, they do not want to read the simple picture books that are designed for beginner readers. That’s why it is always great when you can find novels with nice simple writing – just what these kids need to help build their confidence. The Hey Jack series have very easy language and not too much writing, while still having that look of being a novel.
IMG_9552
Another recent find was the Mega Mash Up Series. I found these ones at the Museum gift shop. Once again, it is a series that looks like a novel but has not too much writing, although there are some quite difficult words.
IMG_9554
These books have the added fun of being a ‘draw your own adventure’. All the pictures have sections of drawings that can be filled in, with great open ended suggestions that allow for lots of creative thinking and drawing.

IMG_9555

Do you watch Letters and Numbers? It is a game show on SBS where people try to make the longest word they can out a selection of letters, then they get a selection of numbers which
they have to use in a calculation that equals the target number. Our family love watching it and trying to beat the contestants. If you haven’t seen the show the latest episode is on their website here.
We were pretty excited to find that there is also a series of Letters and Numbers puzzle books.
IMG_9542
We are all hard at work now training for the show. You never know, one day we might be the lucky contestant who walks away with the Macquarie Dictionary prize!
IMG_9541
Seriously though, I couldn’t have planned a better maths lesson. My daughter and my middle son spent an hour or two working through the puzzles tonight. I think we’ll have to keep practicing to get up to the impressive speed of the contestants though.
Well, that pretty much wraps up the first day of the holidays for us. It was a day full of playing, making, reading and having fun, but please, just don’t tell them they were actually learning!
Happy Holidays,
Sharee
X

Fishing and Modified Haiku

Standard

My youngest son is happy now, I finally took him fishing. He loves fishing, but I always put off taking him as long as I can. You see my problem is that I really don’t like killing things. I read that the most humane way to kill a fish is to stab it straight through the top of it’s head, but I just don’t know if I could bring myself to do that. I have visions of the fish still being alive and flapping wildly and me trying to stab it over and over again to get just that right spot in it’s brain that will put it out of it’s misery. We have been fishing quite a few times, and I have been grateful so far that all the fish we have caught have been undersize, so we can watch them in our bucket for a little while then let them go again. But I know the day is going to come when we actually catch a big fish and then I’ll have to do something with it – gulp!

I have a real moral dilemma when it comes to fishing. I hate to hurt things and kill things, but I do love the outdoor family time that we get when we go fishing. I think this is so good for my kids, so I’m willing to sacrifice a few fish in the process (sorry fish).

I do the best I can do to make it as easy on the fish as I can. I have read that you should crimp the barb on your hook by squashing it flat with a pair of pliers, so we always do this. This makes it a lot easier to remove the hook from undersize fish without hurting them, and also makes it more likely that the hook will come out naturally if they happen to take your hook.

The other things that we do are to lift the fish up out of the water with a net as soon as possible, rather than just pulling it up with all it’s weight on the hook, and we try to make sure our hands are wet before handling the fish, or use a damp towel. A pair of pliers is always handy to make sure you can get the hook out as quickly and cleanly as possible.

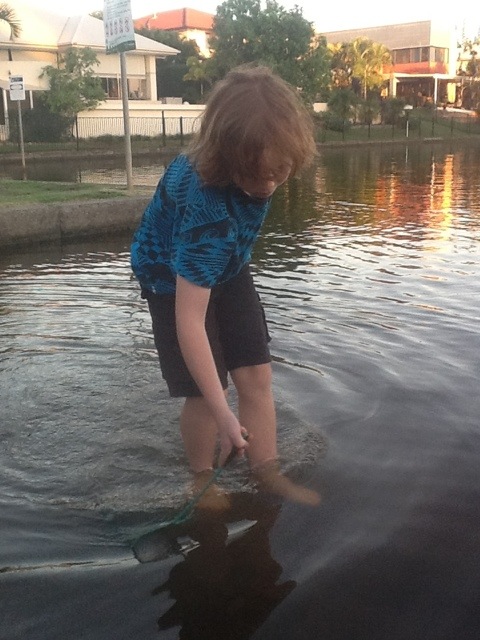
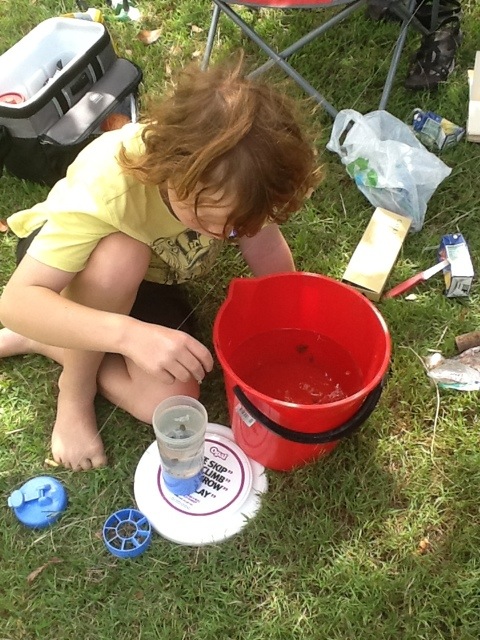
The boys also had a lot of fun collecting water bugs and little fish to look at while they were waiting for the fish to bite. Is was quite interesting today as we were fishing in a channel in a housing estate. The channel fed from the sea, but also receives fresh water, so there was an interesting mix of salt tolerant water bugs and fresh water tolerant fish.

20120313-190039.jpg

20120313-190118.jpg

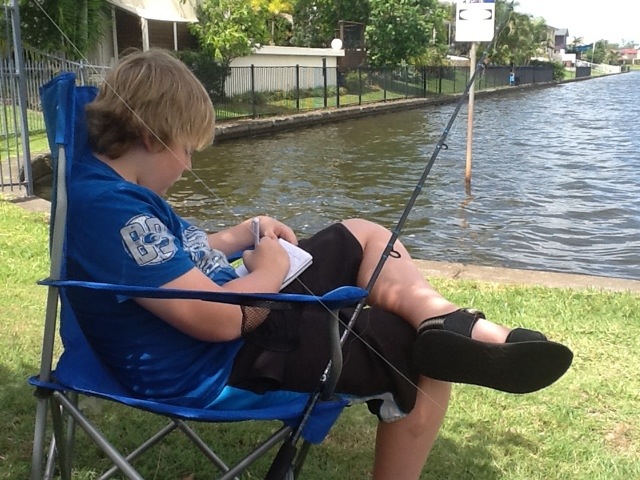
The good thing about fishing is that while you are sitting there waiting for the fish to bite, you can always fit in a bit of drawing or writing. It’s a great way to get some schoolwork done in a fun way – the joys of homeschooling.

20120313-184554.jpg

We have been writing a few Haiku poems this week, so this fitted in perfectly with our fishing theme.

Haiku poems are great for beginners or reluctant writers because they don’t have many words and they are pretty easy to write.
Traditionally, a Haiku poem is made up of three lines with, the first line has 5 syllables, the second has 7 syllables and the third has 5 syllables. This can be a little daunting for kids though. All that thinking about syllables blocks off their creative brains.

A good way to start with kids is with a modified haiku. In the modified Haiku you have a short line, then a longer line, then another short line, but don’t worry too much about the syllables. If you read lots of Haiku poems to the kids before they start writing you will find that often they pick up the rhythm anyway, so their poems will be pretty close to the correct format without needing to count all the syllables. Even if they’re not correct, they are still being creative and writing so that’s all good.

Here are a couple of poems by Zac

Cheese is nice
Some cheese are supposed to be mouldy
I still like cheese.

Games are fun
I like playing games with my friends
I wish I had more friends

Real Life Writing – Zines

Standard

Have you heard about Zines?
Zines are small, home made, limited run periodicals. A huge range of topics are covered in Zines.
The first Zines started way back in the 1930s as fan magazines for fantasy and science fiction buffs. In the 70s zines were popular within the punk music scene, and in the 90s women’s rights were a popular theme. Over the last two decades the popularity of Zines has grown particularly among alternative thinking young people and there are hundreds of different Zines available today.
For a better description from someone who know much more about Zines than me, have a look at this article

I am always on the lookout for fun ‘real life’ writing experiences for my boys, so I was pretty excited when I discovered Zines. I think that publishing a Zine is a great project for children, adults or as a family.

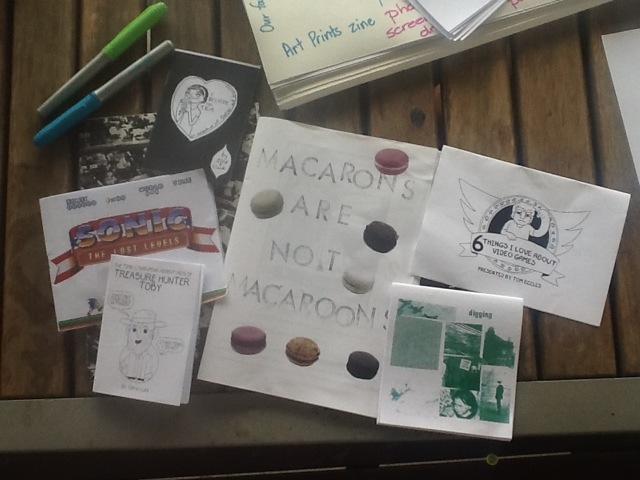
To get my children inspired, the first thing I did was order about 6 Zines from Sticky Institute which is a Zine Distro (distribution centre). I just ordered mine off the website, but if you are in Melbourne, drop in to Sticky and check them out. I tried to select Zines that would be of interest to my boys – you need to be a little bit careful as some of the Zines would have content that is not suitable for children, but I’m sure the staff at Sticky would be happy to advise if you are not sure.
Here is a link to the Sticky Institute Website. There are other Zine Distros around Australia and you will find a list of these on the Sticky website.

20120306-190615.jpg

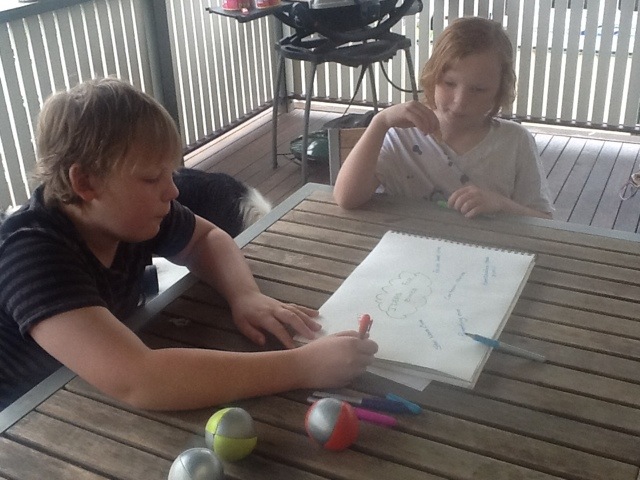
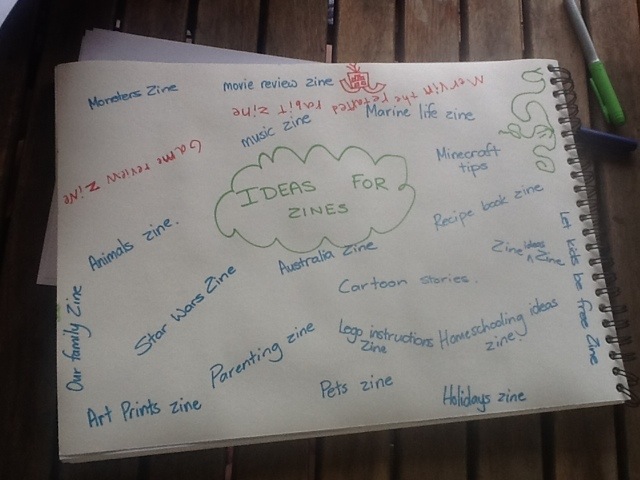
Our next step was to brainstorm ideas for topics that we could make a Zine about.

20120306-190738.jpg

20120306-190753.jpg

I thought we should start by working on one Zine as a family, but Zac was pretty keen to make his own. We selected our topics, then another brainstorm generated ideas for stories and articles.
Z ac decided to make his Zine about Electronic Game reviews, and Axel and I decided ours would be about Minecraft Tips, Pets and Comics!

20120306-191220.jpg

20120306-191228.jpg

After this we all selected a topic for our first article and got to work.
Hopefully we will have some finished products soon.

If your family get into making some Zines and you would like to sell them, you can send them to a Distro like Sticky where they will put them in their shop for sale. This is a great incentive for my boys and really helps to make this a real life writing experience.

Get creative and have fun with Zines!

All the best,
Sharee

Brittany’s ‘Fly’ Scarf

Standard

I have decided to make a new schedule to keep my blog rolling along. On Mondays I will write about homeschooling, on Wednesdays it will be a lifestyle post, and on Fridays it will be a post about art. This is very good timing for me because today is Friday and I have just finished Brittany’s scarf.

This is the scarf I have been making for my son’s girlfriend, Brittany, who lives in America. It is a present for her birthday which was a couple of weeks ago – hopefully she will forgive my lateness. I wanted to make her a scarf because where she lives it is very cold and she wears a scarf every day. It is made using recycled fabric from clothes I have bought from the Op Shop, which I have cut up, dyed, bleached, printed, manipulated and generally experimented on. I was using all these pieces to experiment and refine my skills especially using dye paste and bleach paste printing.
The scarf is called ‘Fly’. Brittany and my son enjoy doing a lot of bird watching together (so sweet), so I wanted it to have a birds theme and I have included bird prints, feather prints, and phrases about flying in the embroidery.

This is the first time I have done freestyle machine embroidery and I am absolutely hooked – love the effect of the ‘messy’ sewing, and it is really quite relaxing to do. I really need a better sewing machine though, that is first on my list of things to buy when I sell a few pieces.

Ok, here it is….

IMG_0372

Unfortunately, the photos are terrible, but I wanted to get this post up today, will try and get some better ones tomorrow.

IMG_0376

IMG_0374

IMG_0373

IMG_0378

I have another scarf in pink and blue colourways that I will finish off this week and then put up for sale somewhere, not sure where yet, but stay tuned to see that one next Friday.

Only 7 weeks to go until the artists books exhibition at the Riddoch Gallery In Mt Gambier, so I will need to get back to work on my books this week too.

I hope you are finding opportunities to be creative too.
All the best,
Sharee

More Productive Home Making – Smell That Coffee

Standard

People who know me will know that I am pretty serious about my coffee. Well, as serious as you can be when you drink Decaf lol.
A few years ago I did a Barista course, and I have worked in a coffee van and a cafe, so I expect my coffee to be pretty good. Unfortunately the rest of the family has raised their coffee expectations as well, and with 3 or 4 coffee drinkers in the house it was becoming a major expense.
I have found a fair trade coffee that we can grind fresh at our local Health Food Supermarket. It is just beautiful, but costs $10 for 200grams, and that lasts us less than a week.
This was obviously an area where we could make cuts to the budget. We often buy cheaper pre ground coffee from the supermarket, but I don’t think you really save much money this way because you need twice as much coffee to get the same strength, and the flavour will never be the same.
I was looking for places to buy cheaper coffee on the internet when I came across an online store that was selling green coffee beans. The Decaf green beans were only $18 a kilogram – a huge saving on the the little 200gram bags which work out at $50 a kilogram.
A bit more internet research showed me that home coffee roasting is actually a growing trend, and also I found that you can actually roast coffee in a home popcorn machine! A little harder to find was a local source of green coffee beans (I didn’t want to spend all my savings on postage), but eventually I tracked down a factory that wasn’t far away and was open to the public.
And so my coffee roasting adventure begins…

20120214-193127.jpg
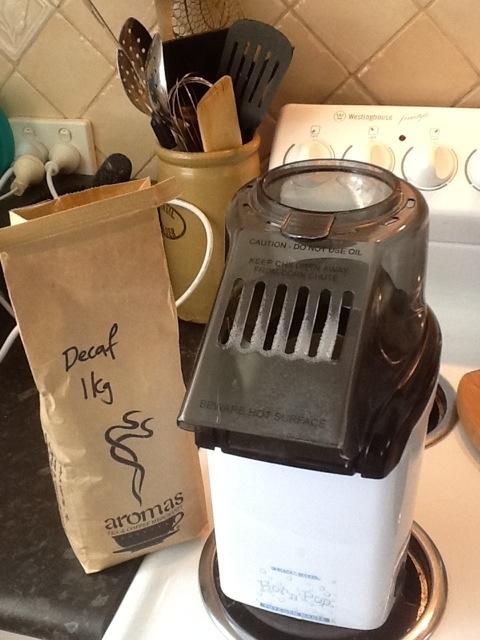
We got this popcorn machine for $8 at a garage sale. It actually works really well for roasting the beans. I put 1 scoop of green beans into the machine then switch it on. After a few minutes the beans start to pop and when they have popped for a little while our popcorn machine conveniently switches itself off (because it has got too hot), and about this time smoke will start pouring out. This is all ok though, I quickly tip the beans out into a saucepan so that they don’t burn and shake them around a little as they cool. They are now lightly roasted.

20120214-214845.jpg
I tried some beans at this stage, but the coffee flavour was very mild so I decided to roast them a bit more.
The beans went back in for one more go, this time they had just started popping when the machine cut out. When I tipped them out they actually looked pretty perfect!
In the photo above you can see the green beans, the lightly roasted beans, and the darker roast.
Next step was to grind our beans. I have been drooling over a Rancillio Rocky grinder for a while now, but at $400 it’s a bit out of my price range, then I spotted this grinder at KMart for $12. To my utter amazement it works really well, as long as you only need a small amount of coffee.
You really should wait a week after roasting before using the coffee, but I couldn’t wait to try it, and I had run out of my regular coffee, so after the beans had cooled down they went straight into the grinder.

20120214-215552.jpg

Here is my coffee shot, very nice creama from my freshly roasted and ground coffee beans.

20120214-231227.jpg

And here is my latte.

20120214-232403.jpg
Delicious!

I’m looking forward to learning more about coffee roasting and experimenting with some blends in the future.
Hope you can get your hands on a really good coffee today too.
All the best,
Sharee